
Dental Bonding in Langdon, AB: Biomimetic Composite Artistry
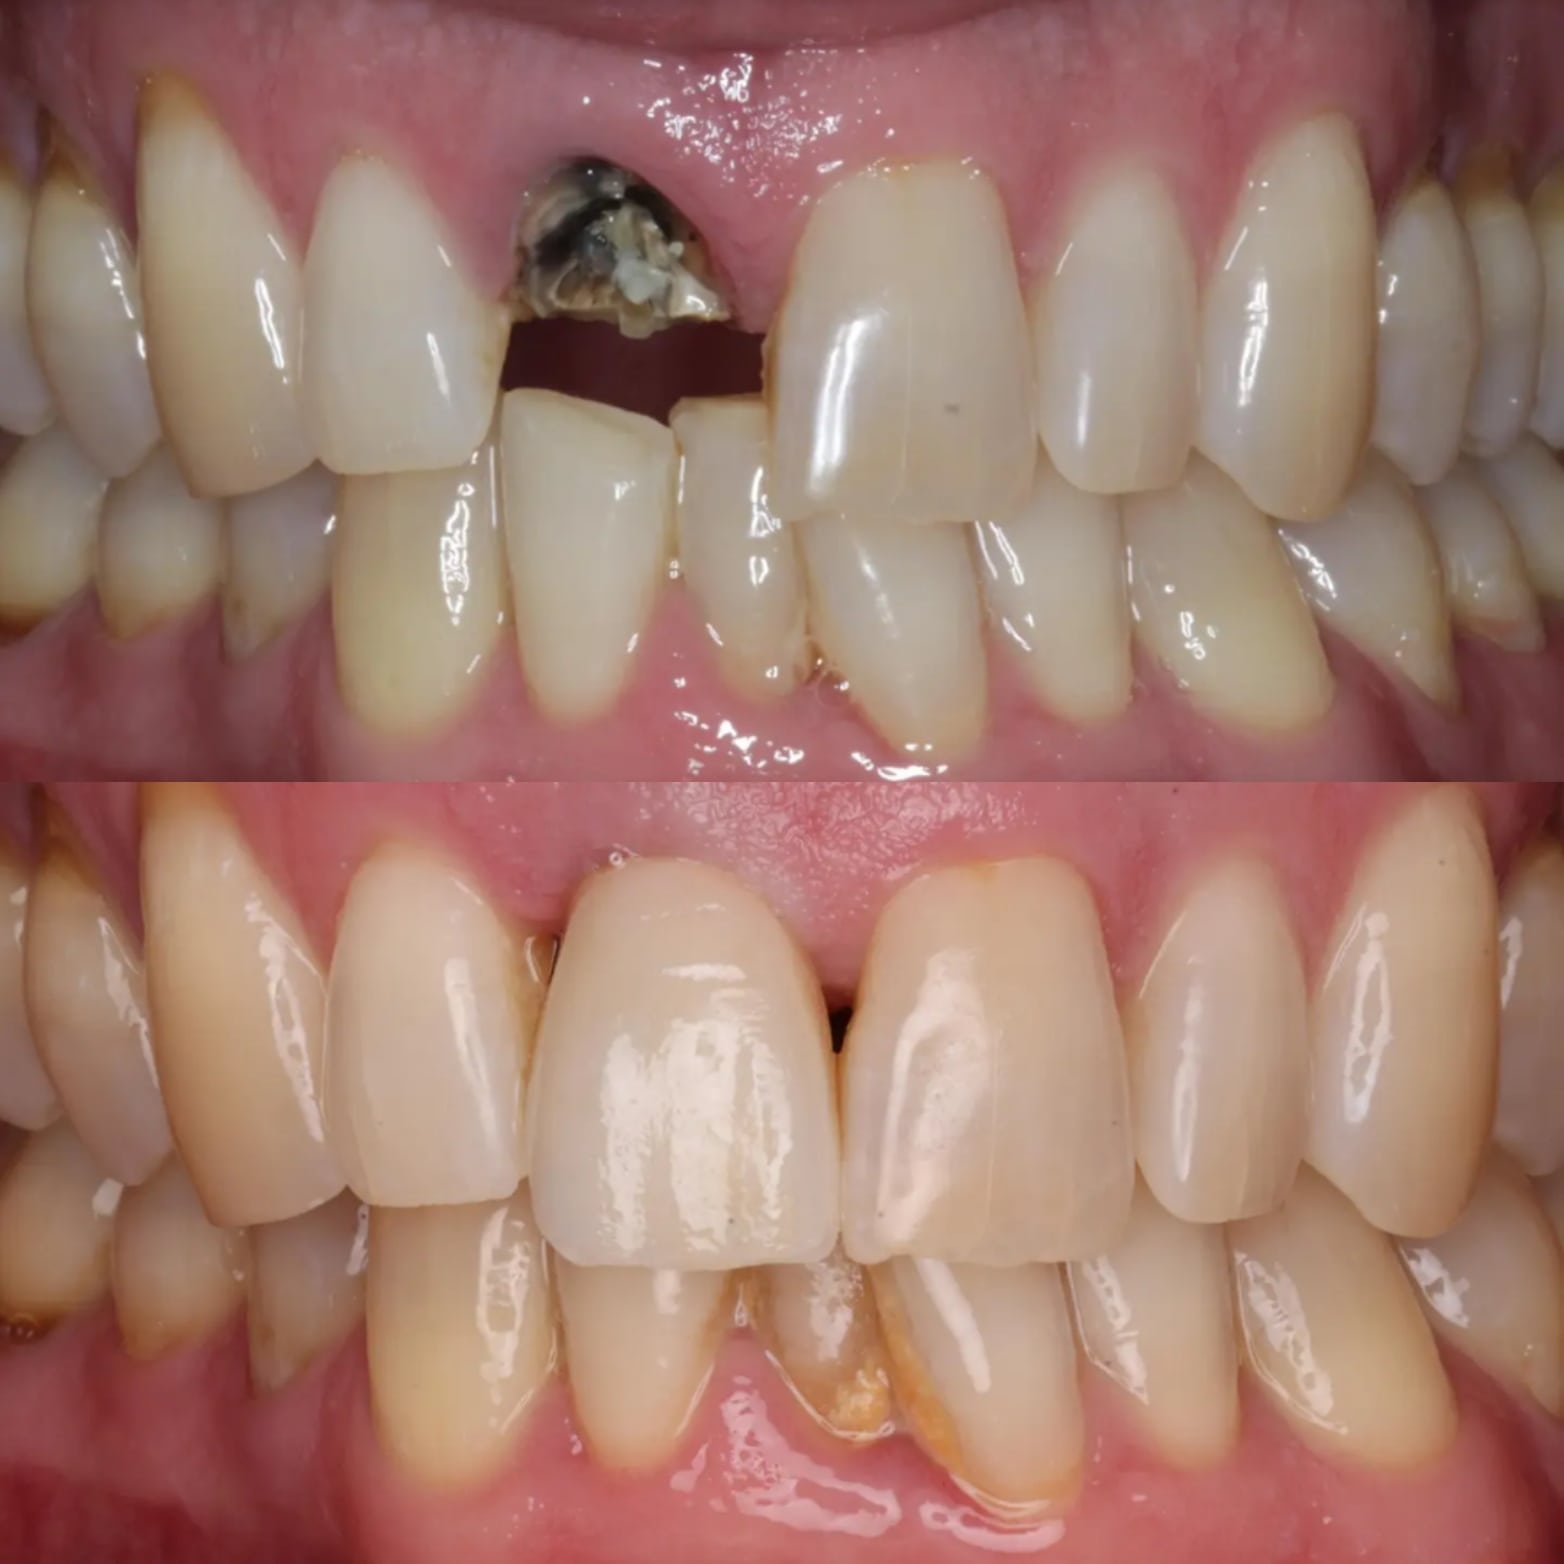
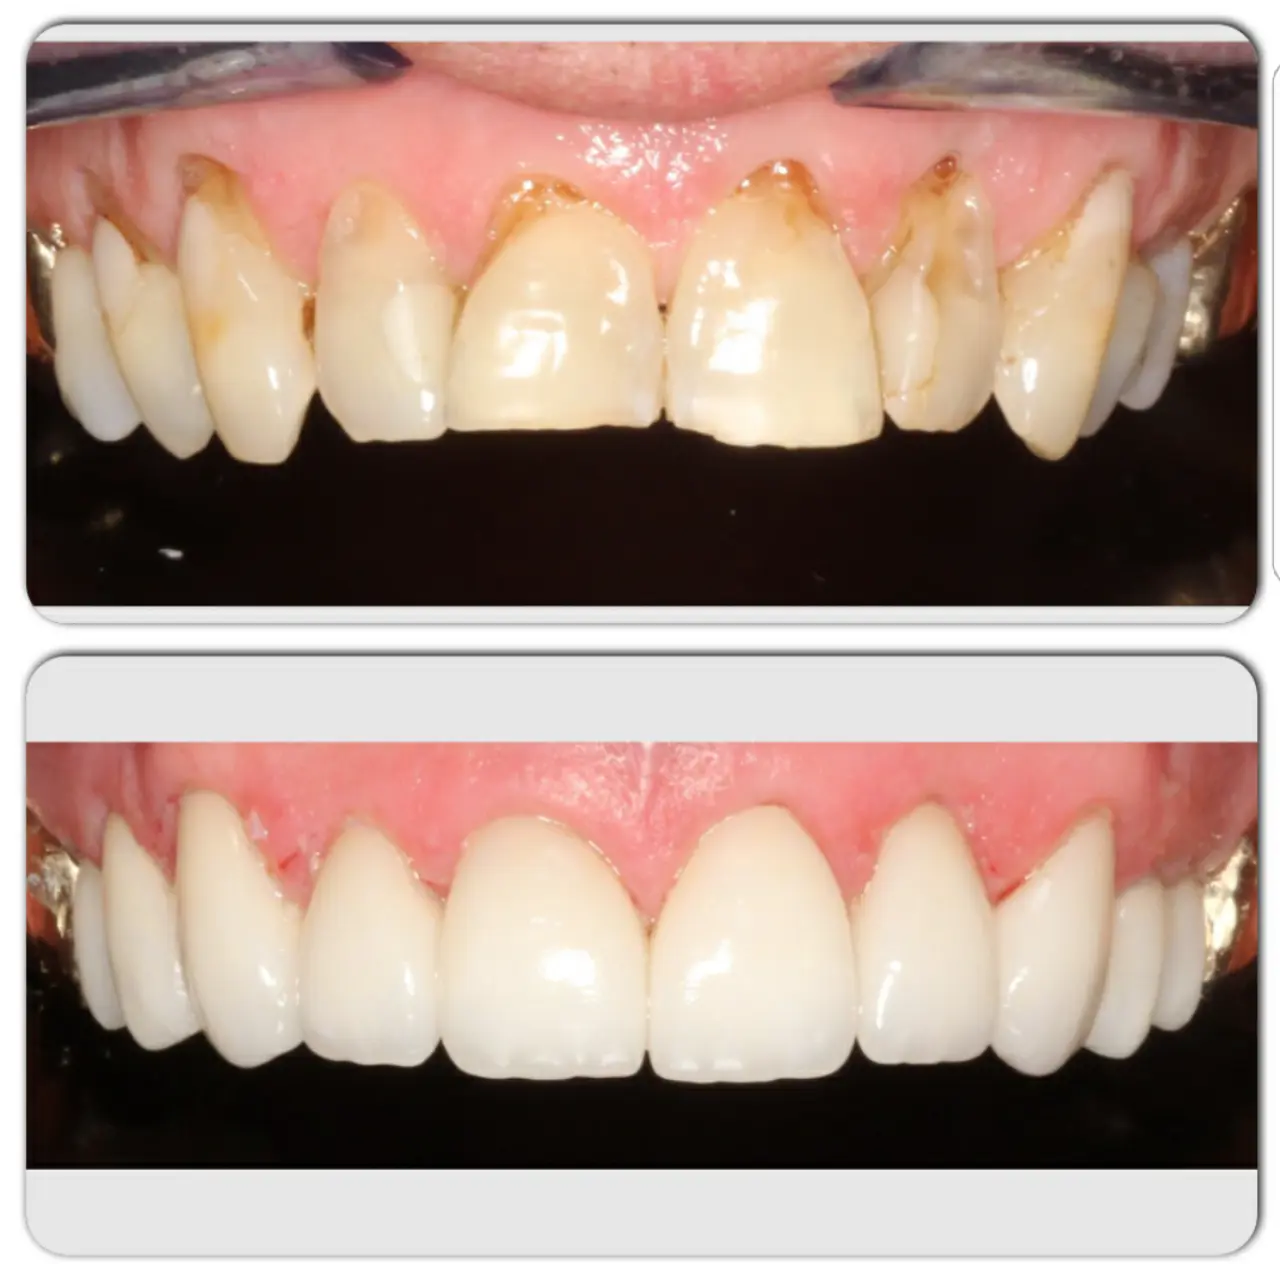
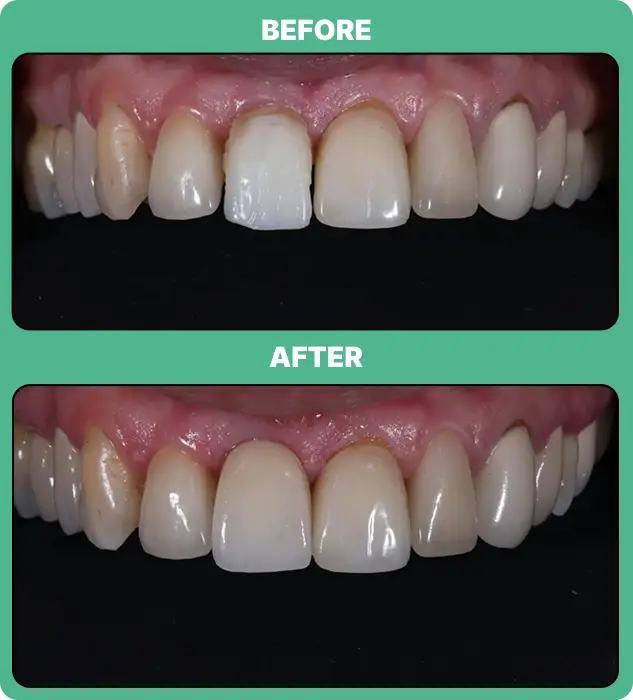
At Langdon Dental Associates, tooth bonding isn’t just about filling a gap or covering a chip — it’s about rebuilding a tooth the way nature built it in the first place. Our biomimetic approach to bonding layers materials the same way your tooth naturally layers dentin and enamel, so the final result looks, feels, and performs like real tooth structure.
Our Philosophy: Restore, Don’t Just Repair
Biomimetic bonding is built on a simple principle: remove as little healthy tooth structure as possible, and replace what’s missing with materials — and a technique — that recreate the tooth’s natural strength and optical properties. Rather than treating a cavity or chip as a hole to be filled, we treat it as an opportunity to rebuild the tooth’s original architecture, layer by layer.
This starts with a conservative preparation. We remove decay, old restorative material, or damaged structure only — healthy enamel and dentin are preserved wherever possible. The less native tooth structure we remove, the stronger and more predictable the final bonded result.
Our Bonding Technique, Step by Step
Before any procedure, we use CBCT 3D imaging to map the exact position of your wisdom teeth relative to nerves, sinuses, and surrounding teeth. This lets us anticipate complexity ahead of time and walk you through exactly what to expect — no surprises.
1. Micro-Etch
Before any bonding agent is applied, the preparation surface is micro-etched using fine aluminum oxide particles under air abrasion. This cleans the surface at a microscopic level and creates a slightly roughened texture that dramatically improves the strength of the bond that follows — a step that’s often skipped in less meticulous bonding protocols.
2. Etch
An acid-etch (typically phosphoric acid) is then applied to the enamel and dentin. This step selectively demineralizes the surface, opening up the microscopic pore structure of enamel rods and dentin tubules so the bonding resin has something to mechanically grip onto.
3. Prime
A primer is applied to penetrate the etched dentin, wetting the exposed collagen fibers and preparing them to accept the bonding resin. This step is critical for dentin bonding specifically — it’s what allows the resin to properly infiltrate and form a strong hybrid layer rather than a weak, leaky interface.
4. Bond
A bonding resin is then applied and light-cured, sealing the etched and primed surface and creating the adhesive layer that the composite restoration will be built on. This is the foundation the entire restoration depends on — a well-executed bond here is what prevents future sensitivity, staining at the margins, and premature failure.
Layering for Natural Esthetics
Once the bond is in place, we build the restoration in layers, using different composite shades to recreate the way natural tooth structure actually behaves optically:
- Dentin shades are placed first, deep in the restoration, to recreate the warmer, more opaque body of the tooth and block out any dark background.
- Enamel shades are layered over top, mimicking the translucency and slightly cooler, more neutral tone of natural enamel.
- Effect shades — including tints for characterization like white flecking, subtle grey translucency at the incisal edge, or warmer tones near the gumline — are added selectively to blend the restoration seamlessly into the surrounding natural tooth.
Each layer is individually light-cured before the next is placed, and the composite is then shaped, textured, and polished to match the surface characteristics of the adjacent teeth. Done well, a layered composite restoration is very difficult to distinguish from natural tooth structure, even up close.
Two Ways to Restore: Hand-Layered or Milled
Depending on the size, location, and esthetic demands of the restoration, we have two pathways available:
- Direct hand-layered composite bonding: Built up freehand, chairside, in a single visit — ideal for chips, gaps, minor reshaping, and smaller restorations where the tooth’s remaining structure provides good support and reference.
- Milled restorations: For larger restorations or cases needing a higher level of precision and consistency, we can digitally scan the prepared tooth and mill a custom restoration using CAD/CAM technology, then bond it into place using the same meticulous micro-etch, etch, prime, and bond protocol. This gives us the strength and fit advantages of a milled material with the conservative, bonded approach we use throughout our practice.
Why the Details Matter
A bonded restoration is only as good as the bond itself. Skipping steps, rushing the etch, or using a single shade of composite might save a few minutes chairside, but it shows up later — as staining at the margins, sensitivity, discoloration, or a restoration that never quite matches the tooth around it. Our protocol is deliberately unhurried because every step — micro-etch, etch, prime, bond, and layering — contributes directly to how the restoration looks and how long it lasts.
Interested in seeing what conservative, biomimetic bonding could do for a chipped, worn, or discolored tooth? Schedule a consultation at Langdon Dental to discuss whether bonding is the right fit for your smile.